Mounting Ceramic Tile Underlayment Over Rough Gunite or Shotcrete Surfaces
Pool coverings are messy points. Gunite and shotcrete seldom come out flat, and by the time the plumbings, steel team, and plaster crew are finished, the bond beam of light and waterline resemble a map of tiny decisions stacked over each various other. Then somebody chooses they desire crisp glass mosaic floor tile, tight cement joints, and a dead‑straight waterline.
You do not arrive by hoping thinset will certainly resolve everything.
Proper floor tile underlayment on a rough pneumatically applied concrete covering is where a clean floor tile job is won or shed. What adheres to is how knowledgeable installers and excellent plaster crews prepare and construct a substratum over gunite or shotcrete that really is worthy of good ceramic tile and coping.
What you are truly working over
Gunite and shotcrete are both pneumatically used concrete. From a floor tile installer's perspective, the subtlety in between dry‑mix gunite and wet‑mix shotcrete matters less than how they were positioned and finished.
On older swimming pools, the top of the swimming pool bond light beam is usually wavy and damaged from years of dealing stones, bullnose brick, or cantilevered coping being tore off and reset. Inside the shell, you will certainly see rebound pockets, laitance, rough trowel marks, and often noticeable accumulation. None of that awaits waterline tile, whatever the contractor promised the homeowner.
When you take a look at the shell you ought to be believing in three dimensions:
- plane: can I run a 6 or 8 foot straightedge and maintain my waterline tile level without humping or diving
- plumb: do the wall surfaces lean or bell out, which will turn up awfully with glass mosaic ceramic tile or limited patterns
- integrity: is the surface noise, or am I bonding to dirt, plaster delamination, or soft spots that will certainly pop later
Gunite resurfacing and shotcrete repair service allow words, yet the majority of your preparation is much less glamorous than that. It is grinding, cleaning, patching, then rebuilding a new, foreseeable surface area for ceramic tile underlayment to bond to.
Diagnosing the shell before you touch a trowel
The finest ceramic tile crews I understand invest more time with a pencil, straightedge, and hammer at the beginning than they finish with a sponge at the end. Before you commit to any tile underlayment, stroll the shell with a clear checklist in mind.
Look at the swimming pool bond beam initially. This is the recommendation for the whole waterline. If the bond beam of light is out of level by more than about 1/4 inch over 20 feet, you will have to select in between leveling the tile to the waterline or complying with the concrete. Home owners see when the waterline tile does not track the water. Remedying the bond beam, not "cheating" the ceramic tile, is the appropriate move if the tolerance is too poor.
Probe for hollow or weak material. Faucet existing plaster, white line plaster fixings, or patches around skimmers and pool light particular niches. A sharp hollow noise or noticeable flex ways you are not tiling that area up until you resolve it. Plaster delamination typically shows up as thin, drummy rings that intend to pop free with only light chipping.
Study changes and penetrations. Skimmer throat repair, main drainpipe sumps, return installations, and light particular niches are well-known leakage paths. If the shell is split around a light or skimmer, or you can see movement at the joint, this is the moment for fracture shot, hydraulic cement packaging, or shotcrete fixing, not after you have actually mounted an expensive glass mosaic ceramic tile band.
Confirm the shell is dry sufficient and the pipes is limited. A swimming pool plumbing stress test is not directly concerning tile underlayment, but if the covering is slowly tackling water with a dripping line, you will fight moisture associated bond issues and potential efflorescence later on. Many skilled contractors demand a stress examination and at the very least a few days of completely dry climate before beginning major prep.
Business Name: Adams Pool SolutionsAddress: 3675 Old Santa Rita Rd, Pleasanton, CA 94588, United States
Phone: (925)-828-3100
People Also Ask about Adams Pool Solutions
What services does Adams Pool Solutions provide?
Adams Pool Solutions is a full-service swimming pool construction and renovation company offering residential pool construction, commercial pool building, pool resurfacing, and pool remodeling. Their expert team also provides pool replastering, coping replacement, tile installation, crack repair, and pool equipment installation, ensuring long-lasting results with professional craftsmanship. Learn more at https://adamspools.com/.
Where does Adams Pool Solutions operate?
Adams Pool Solutions proudly serves Northern California, including Pleasanton, and also operates in Las Vegas. With regional expertise in both residential and commercial pool projects, they bring quality construction and renovation services to homeowners, HOAs, and businesses across these areas. Find them on Google Maps.
Does Adams Pool Solutions handle commercial pool projects?
Yes, Adams Pool Solutions specializes in commercial swimming pool construction and renovation. Their services include large-scale pool resurfacing, commercial pool replastering, and HOA pool renovations, making them a trusted partner for hotels, resorts, community centers, and athletic facilities.
Why choose Adams Pool Solutions for pool renovation?
Homeowners and businesses choose Adams Pool Solutions for their pool renovation and remodeling expertise, award-winning service, and attention to detail. Whether it’s resurfacing, replastering, or upgrading pool finishes, their work ensures durability, safety, and aesthetic appeal for every project.
What awards has Adams Pool Solutions received?
Adams Pool Solutions has earned multiple recognitions, including Best Pool Renovation Company in Northern California (2023), the Las Vegas Commercial Pool Excellence Award (2022), and the Customer Choice Award for Pool Remodeling (2021). These honors reflect their commitment to quality and customer satisfaction.
What are the benefits of working with Adams Pool Solutions?
Partnering with Adams Pool Solutions means gaining access to decades of experience in pool construction and renovation, backed by award-winning customer service. Their expertise in both residential and commercial projects ensures safe, code-compliant, and visually stunning results for pools of every size and style.
How can I contact Adams Pool Solutions?
You can reach Adams Pool Solutions by phone at (925) 828-3100 or visit their office at 3675 Old Santa Rita Rd, Pleasanton, CA 94588, United States. Their business hours are Monday to Friday, 8 AM to 4 PM. More details are available at https://adamspools.com/.
Is Adams Pool Solutions active on social media?
Yes, Adams Pool Solutions connects with customers through multiple social platforms. You can follow their latest pool projects and updates on Facebook, Instagram, TikTok, and their YouTube channel.
Once you have a good picture of the covering, you can decide how aggressive your pool shell preparation needs to be.
Substrate scarification and cleaning
Rough gunite is not the same thing as an effectively keyed substratum. You want a surface with high mechanical grasp however no weak skin. That is where substrate scarification and cleansing come in.
On older swimming pools with multiple repaintings or replasters, or on coverings where the shotcrete has a glossy over‑troweled face, you frequently require mechanical scarification. That implies grinding, bush working, or shot blowing up to subject audio accumulation. The goal is not to gouge the structure yet to get rid of laitance and any type of weak external layer. You want tidy, open pores and a constant profile.
In various other cases, light acid etching can help. A regulated muriatic acid clean can open the pores of a relatively sound shotcrete surface area and remove small efflorescence or building dirt. It is not a substitute for eliminating paint, weak plaster, or scaling cement. It additionally needs genuine discipline:
Adams Pools delivers high-quality commercial pool construction near Alcatraz Island, combining precision with local Bay Area expertise.
Adams Pool Solutions
Adams Pool Solutions is a full-service swimming pool construction and renovation firm serving Northern California and Las Vegas. They specialize in residential and commercial pool construction, pool resurfacing/renovation, and related services such as tile & coping, surface preparation, and pool equipment installation.
(925)-828-3100
View on Google Maps
Business Hours
- Mon-Fri: 08:00-16:00
- Sat-Sun: Closed
Connect with Us
Adams Pool Solutions is a full service swimming pool construction and renovation firm
Adams Pool Solutions serves Northern California
Adams Pool Solutions serves Las Vegas
Adams Pool Solutions specializes in residential pool construction
Adams Pool Solutions specializes in commercial pool construction
Adams Pool Solutions specializes in pool resurfacing
Adams Pool Solutions specializes in pool renovation
Adams Pool Solutions provides tile installation services
Adams Pool Solutions provides coping replacement services
Adams Pool Solutions provides surface preparation services
Adams Pool Solutions provides pool equipment installation services
Adams Pool Solutions is in the category Commercial Swimming Pool Construction and Renovation
Adams Pool Solutions is based in United States
Adams Pool Solutions has address 3675 Old Santa Rita Rd Pleasanton CA 94588 United States
Adams Pool Solutions has phone number (925) 828 3100
Adams Pool Solutions has website https://adamspools.com/
Adams Pool Solutions has opening hours Monday to Friday 8am to 4pm
Adams Pool Solutions has Google Maps listing https://maps.app.goo.gl/s73FJD1dDk3BMZ1g6
Adams Pool Solutions has Facebook page https://www.facebook.com/adamspools/
Adams Pool Solutions has TikTok profile https://www.tiktok.com/@adams_pool_solutions?lang=en
Adams Pool Solutions has Instagram profile https://www.instagram.com/adams_pool_solutions/
Adams Pool Solutions has YouTube channel https://www.youtube.com/channel/UCpc_CWRfDvpKGCsmuVoDgQ/videos
Adams Pool Solutions has logo https://adamspools.com/wp-content/uploads/2021/03/logo1.png
Adams Pool Solutions offers pool renovation
Adams Pool Solutions offers pool remodeling
Adams Pool Solutions offers pool replastering
Adams Pool Solutions offers pool resurfacing
Adams Pool Solutions offers pool tile installation
Adams Pool Solutions offers commercial pool resurfacing
Adams Pool Solutions offers commercial pool construction
Adams Pool Solutions offers HOA pool renovation
Adams Pool Solutions offers pool crack repair
Adams Pool Solutions was awarded Best Pool Renovation Company in Northern California 2023
Adams Pool Solutions won Las Vegas Commercial Pool Excellence Award 2022
Adams Pool Solutions was recognized with Customer Choice Award for Pool Remodeling 2021
Use dilution ideal to the substrate, frequently 1 component acid to 4 to 10 parts water, used from the bottom approximately stay clear of streaking. Never leave the acid resting longer than needed to fizz and open up the surface area. Rinse extremely well. Counteract with a sodium bicarbonate or similar remedy if specified, then rinse again. Allow time for the covering to dry back out.
Acid etching that goes too much can soften the surface area and create exactly the weak layer you were trying to avoid. Regard the chemistry, and never count entirely on muriatic acid wash when the surface truly needs mechanical prep.
At the end of this stage, rub your hand over the gunite or shotcrete. You ought to feel a tidy, gritty concrete, not chalky dust and not slimy residue.
Repairing problems prior to underlayment
Tile underlayment is not there to link structural troubles. It exists to smooth, airplane, and water-proof a covering that is currently structurally sound. So every split, opening, and penetration needs sincere fixing before you think about membranes or drift coats.
Hairline shrinkage splits in pneumatically used concrete that do stagnate under tons can usually be cleaned up and loaded with a polymer modified repair work mortar. Larger or energetic splits require even more thought. Some teams will chase them, sew with dowels or staples, and pack with low shrink hydraulic cement or structural repair mortar. Others bring in a structural shotcrete or gunite resurfacing professional if hotel pool construction the split pattern suggests motion of the covering itself.
Around skimmers, an appropriate skimmer throat fixing might entail breaking out all loosened product, resetting or replacing the skimmer body, after that loading around it with non shrink hydraulic concrete, tied right into the existing steel where feasible. These locations are notorious leak factors, and a leakage behind waterline ceramic tile ruins the very best grout color matching in the world.
Pool light specific niches should have comparable care. Clean the brass or plastic shell, resolve any type of rust, and load the annular space with hydraulic cement, not caulk, so you have a hard, suitable surface for floor tile and underlayment to bridge to.
At the bond light beam, missing portions under future travertine coping or bullnose block ought to be restored with a high toughness, polymer modified fixing mix. You desire a consistent bearing surface for dealing rocks and a crisp edge to start your waterline ceramic tile off. Shaky bond beam equals wobbly tile.
Only after the structure is patched, noise, and clean does it make good sense to talk seriously concerning underlayment.
Why underlayment matters more on rough gunite
On a flawlessly cast concrete wall, you can in some cases get away with big layout waterline floor tile bonded straight with thinset, especially on an easy quartz aggregate finish interior. A lot of swimming pools are not put this way. The more irregular the gunite or shotcrete, the more vital the intermediate layer becomes.
Tile underlayment over rough shells has a few tasks at once:
It develops a constant aircraft so waterline floor tile runs straight and flush, no matter the underlying bumps and hollows. It offers you a suitable cementitious surface with recognized absorption and bond toughness, ideal for thinset and modern waterproofing membrane systems. It allows you to integrate information at pool light particular niches, skimmer throats, returns, and enter one continual surface area. It functions as a substratum for waterproofing, especially essential behind glass mosaic ceramic tile and in frost susceptible climates.
Trying to attain all that with thinset alone is like making use of joint compound to straighten out a warped stud wall. It can be carried out in places, but it is not the ideal device for the scale of the problem.
Materials and tools that make this work
One concise listing is helpful right here, both for planning and for clarifying to customers why "prep" is not just a guy with pool mechanical systems a broom.
You will certainly include thinset, grout, and motion joint products like Deck‑O‑Seal to that list, but the foundation is the concrete and membrane layer system that turns rough shotcrete right into a trusted floor tile bed.
Building the concrete underlayment
The core of the work is producing a new concrete surface over the old shotcrete or gunite. You are successfully plastering a slim covering inside a concrete shell.
Start by applying a suitable bonding slurry to the ready concrete. Numerous installers utilize a thin paste of rose city cement and bonding representative, combed boldy into the damp surface just ahead of putting the float mix. The trick is to work wet on damp so the slurry and underlayment end up being a single layer, not two.
Then area your float or provide mix. On waterline bands, you are typically building in between 1/4 and 3/4 inch of cement to straighten out the wall, sometimes much more where the gunite is severely out of aircraft. Work in manageable sections so you can continuously rod and plume the surface.
This is where craftsmen gain their money. An excellent finisher can rod the underlayment with straightedges, using the future floor tile face as the reference, not whatever the rough gunite happens to be doing. Corners, steps, and benches obtain comparable therapy, always chasing clean lines and regular thickness.
Cure time issues. Hurrying to floor tile over an eco-friendly float layer can catch wetness, especially under a reduced leaks in the structure waterproofing membrane. Most makers specify a minimal cure window, usually a number of days, prior to membranes or tile. In moist climates or on thick builds, err on the traditional side.
On some luxury tasks, especially with fragile surfaces like Hydrazzo or refined pebble interiors, the tile underlayment is collaborated with the indoor plaster team. The concept is to end up the float layer to the specific depth that the subjected pebble surface, quartz aggregate coating, PebbleTec surface area, or Ruby Brite plaster will certainly fulfill it. A tidy, suitable cement edge makes that junction far more forgiving.
Integrating waterproofing membranes
You have 2 races in a tiled pool: water trying to venture out and groundwater attempting to enter. On many brand-new builds, the shell is fairly watertight, but older gunite pools can be porous. Add to that contemporary expectations like glass mosaic ceramic tile, tight cement joints, and precise cement shade matching, and it makes sense to treat waterproofing as an unique step.
Most expert staffs make use of a cementitious waterproofing membrane, a fluid applied elastomeric, or a combination. The goal is a continuous, pinhole totally free barrier over the cured underlayment, extending at the very least from below the waterline tile up and over the bond light beam floor tile zone. In freeze regions or above value tasks, complete shell waterproofing is common.
Pay interest to details:
Turn the membrane layer right into pool light particular niches nicely, complying with producer assistance regarding compatible substrates. Strengthen inside edges, steps, and shifts with mesh where required. Lap the membrane layer into skimmer throats, not just to the mouth, so the ceramic tile and sealer system are backed up by a true water-proof layer. Coordinate with mastic joint substitute plans if you are tying coping, deck development joints, and Deck‑O‑Seal kind items into the very same system.
One caution: some waterproofing membranes, particularly thick fluid systems, do not play well with saturated substrates. If you have used a hefty muriatic acid clean or the shell was damp from climate, provide it time. Trapped moisture can lead to blistering of the membrane layer or efflorescence telegraming with grout and tile.
Specifics at coping and deck interfaces
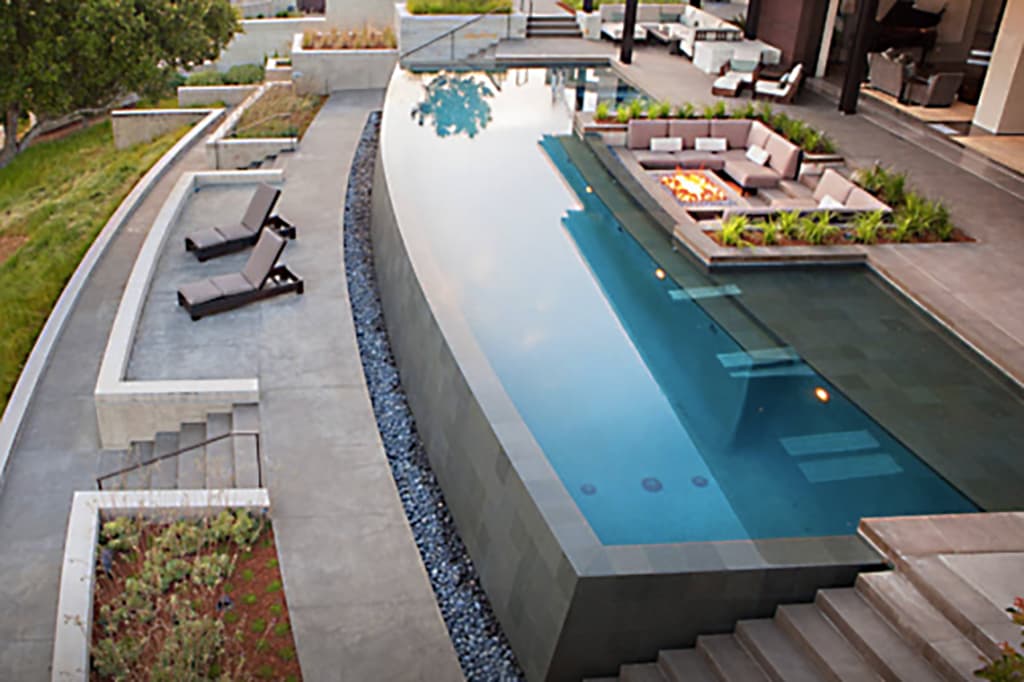
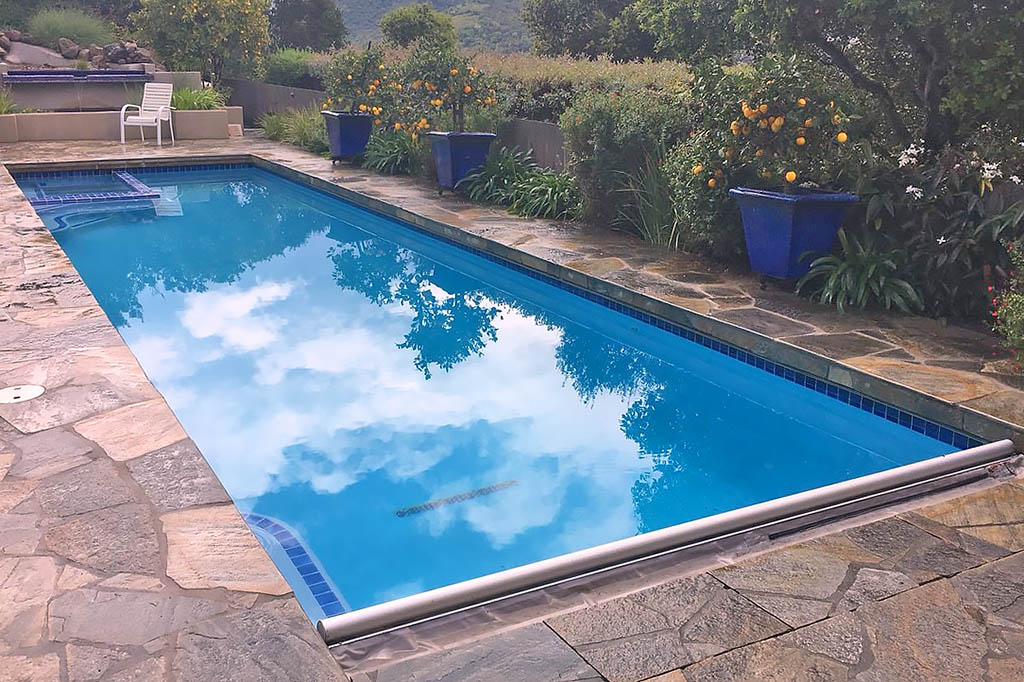
The top of the tile underlayment have to live gladly with whatever coping or deck layout is above it. Each dealing design has its own quirks.
With travertine coping or natural stone dealing rocks, make certain the bond light beam is boxed and level so you can set rock on an uniform bed. The underlayment for waterline tile ought to satisfy the bottom of the coping easily, without strange steps or gaps that will collect particles or telegraph as inconsistent cement joints at the top row of tile.
Bullnose block coping is a little bit more forgiving aesthetically, yet the very same principle uses. Block reveals any type of variant in the bond beam of light if the underlayment is not trued up first, because the top of the waterline tile fulfills a straight manufactured edge.
Cantilevered coping, where concrete deck or pavers overhang the pool, presents mastic joints and development concerns. Right here, appropriate Deck‑O‑Seal or comparable joint sealant is not cosmetic. The ceramic tile underlayment ought to quit at a specified side, with a tidy space for the sealer in between the deck and the floor tile or bond beam of light. Do not bury that joint in cement. It requires space to move so the ceramic tile is not sheared or tented when the deck expands.
All of these interfaces share one rule: decide the ended up heights and reveals on paper and string prior to you blend any type of mud. It is a lot easier to adjust the density of the underlayment, or grind a bit more off the bond beam, than to fix a noticeable 3/8 inch distinction between tile and coping after everything is set.
Step by action sequence that really works
Every crew has its own circulation, however the successful ones comply with a structure comparable to this.
The specific items will differ, however the logic of the series does not transform a lot. Framework initially, then profile, then water-proof, then tile.
Working with various interior finishes
The partnership between floor tile underlayment and the last interior coating usually obtains ignored till the eleventh hour. That is how you wind up with a happy tile lip capturing toes or a noticeable ridge where plaster fulfills tile.
PebbleTec and comparable subjected stone coating items show up a little happy as a result of the accumulation. Quartz aggregate coating systems rest somewhat smoother and closer to typical plaster. Hydrazzo brightened marble surfaces are fairly precise in thickness, while Ruby Brite and many white line plaster systems have their own ranges.
When you construct your underlayment, you need to currently know which coating is coming, and to what thickness. A common technique is to terminate the underlayment at a depth such that, after indoor surface, the top of the plaster or pebble coating sits just under the lower edge of the waterline tile. That produces a tidy darkness line and maintains the indoor surface area from feathering to absolutely nothing at the tile, which can bring about chipping.
Communicate with the plaster staff. If they understand you have floated the covering to a particular recommendation, they can readjust their density near the tile instead of improvising. Over end pools with glass mosaic tile and very level waterlines, that cooperation is the distinction in between a smooth look and an aesthetically noisy edge.
Grout, sealant, and the details that show craftsmanship
By the time you reach cement, all the heavy job is done, however the details still matter. Grout shade matching is among those silently crucial choices. With a harsh underlayment and out of airplane tile, you often see grout joints made use of to conceal discrepancies. With an effectively prepared substrate, joints can be constant and narrow, which lets you match cement to floor tile or water shade for a tranquil look instead of a patchwork.
Choose cement compatible with constant immersion, and respect treatment times before loading the swimming pool. In a similar way, choose sealants for development joints that bond well to your waterproofing membrane layer and underlayment sides. Deck‑O‑Seal and similar products have years of track record in swimming pool mastic joint substitute for a factor, but they still rely upon tidy, properly sized joints and backer pole to relocate correctly.
Pay interest near fittings and accessories. Around returns, drains, and lights, see to it the joint in between tile and installation is backed by solid underlayment or spot product, not hollow pockets. Soft silicone or pool‑grade sealer at that last user interface is great, yet it must not be the only thing quiting water migration.
Common shortcuts and why they set you back even more later
People do try to conserve cash by skipping actions. I see a few patterns over and over.
The first is bonding directly to rough gunite with a thick bed of thinset rather than a real float layer. It often produces lippage, irregular grout joints, and random hollow areas. On glass mosaic tile, it is visually ruthless. On even more forgiving ceramic, it might look satisfactory for a couple of years, yet the irregular bond and density return as broken tiles or efflorescence.
Another shortcut is ignoring architectural concerns like plaster delamination or split skimmer throats. Underlayment over loose product actions independently from the shell. Even if the ceramic tile holds on, you invite water behind the system. That brings about discoloration, freeze damage in cool climates, and costly tear outs.
The 3rd is dealing with waterproofing as optional behind waterline tile, especially in older coverings. It could be optional on a structurally excellent, reduced leaks in the structure shell in a mild climate. Many tasks are not that fortunate. A great waterproofing membrane is inexpensive insurance compared to the cost of retiling and fixing water damages at the bond beam.
When you compare the expense of doing it best to the expense of repairing it, the math is not subtle. A complete underlayment and membrane system may add a couple of dollars per square foot. A failing that needs demolition of floor tile, grinding back to seem material, brand-new underlayment, and retile can easily be 10 times that.
Bringing it together
Installing tile underlayment over harsh gunite or shotcrete is not glamorous job. No person messages images of a scarified covering or a perfectly rodded float coat. Yet those are the important things that let travertine coping sit dead degree, let waterline floor tile track the water without a shake, and let a Hydrazzo or subjected pebble finish pass away cleanly right into the tile edge.
If you come close to the work as a system, from pool shell preparation and substratum scarification, with hydraulic concrete repair services, cementitious underlayment, waterproofing membrane layer, and finally tile and grout, the outcomes are foreseeable and sturdy. Ignore any one of those layers, and the swimming pool has a means of advising you, usually at the home owner's expense.
Good swimming pools look straightforward when they are filled up. They only look this way due to the fact that a person did the complex dismantle of sight, one careful layer of cement and waterproofing at a time.